This article is the continuation of first part(so you better read first part too :), where we learnt how to create virtual nodes with JSX-like function hyperscript and render them. In this part we will implement “diffing” algorithm of virtual DOM, that is the main advantage of it.
Originally, I was inspired by the talk of Stefan Judis at Web Rebels 2018, so feel free to take a look at it here.
Okay, we have a simple function component that renders dynamic component. Let’s make it a bit complex by introducing its own state and converting it into class with render method. Also we can separate out new People component, that will responsible for rendering only list of emojis. Here how it will look like after:
class People {
  render(props, state) {
    return h(
      'ul', null,
      ...props.list.map(item => h('li', null, item))
    );
  }
}
Nothing special with this component: it just renders list of items that is given in its props. Note: we introduced render method here—it actually creates virtual DOM that we use to render real DOM. And here is how our App component will change:
class App {
constructor(props) {
super(props);
this.state = {
list: [
'🕺', '💃', '😀', '🙋♀️', '💼',
'🕶', '👏', '🤳', '🕵️♀️', '👩🔧',
]
};
this.timer = setInterval(_ => {
this.setState({
list: [...this.state.list, getRandomItemFromArray(this.state.list)]
})
}, 1000);
}
render(props, { list }) {
return h('div', { class: 'app' },
h('h1', null, 'Simple vDOM'),
h(
People, { list }
)
);
}
}
Two things to mention here:
We set its state in its constructor and create timer, that updates its state every 1 second(1000ms)
We call
setStatemethod to update its state.
You can find what does setState method in React’s documentation. We will implement almost the same functionality here — update its state object and make our component to re-render. Of course React’s implementation is not that trivial, it makes bunch of optimizations on top of it, but come on, we are just building it :)
Since the setState is the method that every function will call, it makes sense to create an abstract class that implements it. When you write class MyApp extends React.Component in React you are inheriting the Component class and can use its methods. Okay, let’s scratch our simple Base Component class:
export default class Component {
  constructor(props) {
    this.props = props;
    this.state = {};
  }

  setState(state) {
    this.state = Object.assign({}, state);
    renderComponent(this);
  }
}
Basically, we just initiate our component with props and state fields and implement setState method that basically rewrites our state and calls renderComponent with itself in its parameters. I’ll explain it now, but first of all let’s make changes to our components:
// ...
class App extends Component {
  // ...
}

class People extends Component {
  // ...
}
// ...
Okay, now we have our App and People components updated I’ll try to explain what renderComponent should do.
It grabs the old base(current DOM before change that is saved in component.base)
Renders virtual DOM — that we can get from component.render method and saves it into component.base.
Replaces the old child with the new one
Here it is:
export const renderComponent = (component, parent) => {
  const oldBase = component.base;
  components.base = renderNode(
    component.render(component.props, component.state)
  );
  if (parent) {
    parent.appendChild(component.base);
  } else {
    oldBase.parentNode.replaceChild(component.base, oldBase);
  }
};
I’ve added parent parameter, to that we could use parent.appendChild when we render the root component first time.
One little change to make it perfect is to change a little bit renderNode function. Remember how it looked before:
export const renderNode = vnode => {
  let el;

  const { nodeName, attributes, children } = vnode;

  if (vnode.split) return document.createTextNode(vnode);

  el = document.createElement(nodeName);

  for (let key in attributes) {
    el.setAttribute(key, attributes[key]);
  }

  (children || []).forEach(child => el.appendChild(renderNode(child)));

  return el;
}
It only handles DOM elements, but actually we have something like this in our App component’s render method:
return h('div', { class: 'app' },
         h('h1', null, 'Simple vDOM'),
         h(People)
       );
As you can see nodeName can take not only string values, but also another component/function to render, in our case this is People component. We need to make sure we handle them properly — basically we need to initiate the component, render it and do this with all of its children. Here is our updated renderNode implementation:
export const renderNode = vnode => {
  let el;

  const { nodeName, attributes, children } = vnode;

  if (vnode.split) return document.createTextNode(vnode);

  if (typeof nodeName === 'string') {
    el = document.createElement(nodeName);

    for (let key in attributes) {
      el.setAttribute(key, attributes[key]);
    }
  } else if(typeof nodeName === 'function') { // here is our `People`
    // initiate our Component
    const component = new nodeName(attributes);
    el = renderNode(
      component.render(component.props, component.state)
    );
    // save DOM reference in `base` field as in renderComponent
    component.base = el;
  }
  // recursively do this to all of its children
  (children || []).forEach(child => el.appendChild(renderNode(child)));

  return el;
}
That’s it about rendering! Now our app works perfectly: any state change will cause app to re-render — as a result every child element/component will be updated. To leverage from this approach let’s move update operation in our application from App component to People component (remove constructor from App and write it inside People):
// People component
constructor(props) {
super(props);
this.state = {
list: [
'🕺', '💃', '😀', '🙋♀️', '💼',
'🕶', '👏', '🤳', '🕵️♀️', '👩🔧',
]
};
this.timer = setInterval(_ => {
this.setState({
list: [...this.state.list, getRandomItemFromArray(this.state.list)]
})
}, 1000);
}
And update render method of People from this:
return h('ul', null, ...props.list.map(item => h('li', null, item)));
to this
return h('ul', null, ...state.list.map(item => h('li', null, item)));
Now only People component will be re-rendered when its state updates. Compare these GIFs:
 Application re-render before
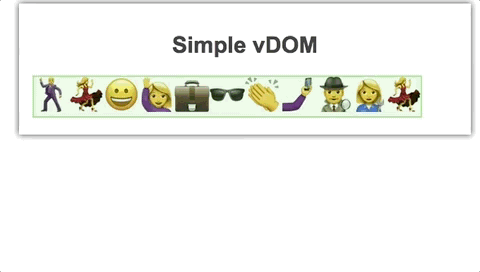 Application re-render after
As you can see only the list updates, while the headline(Simple vDOM) does not re-render. Now we made our components Autonomous.
Note 1: I’ve changed a bit styles: displayed items in flex row, so that adding new items will not cause reflow.
Note 2: To see which parts of the website re-render you can enable Paint flashing in Chrome Dev Tools -> More(… icon)-> More tools -> Rendering)
Diffing algorithm
Well, it looks more like React-ish but re-rendering whole app when we just add a new item to the list is awful. Now it’s time to introduce “Diffing” algorithm that will make our application more powerful.
In our case, we can just naively check if there are any new items in new virtual Node, and if there are any, we will just append it. So let’s start implementing it step by step. First of all, if there is no DOM provided, we just want render our virtual node and append it to the parent:
const diff = (dom, vnode, parent) => {
  if (dom) {
    // ...
  } else {
    const newDom = renderNode(vnode);
    parent.appendChild(newDom);
    return newDom;
  }
}
This is applicable for the first run — where there is no DOM rendered yet, and the only place where we give parent in its parameters. So we can use it for initial rendering, here how we will do it:
const render = (vnode, parent) => {
  diff(undefined, vnode, parent);
}

render(h(App), document.querySelector('#root'));
Okay, now we rendered our app, the People component will update its state after 1 second(remember the timer we set?). That will cause our renderComponent to be called, so it will also be changed:
export const renderComponent = (component) => {
  let rendered = component.render(component.props, component.state);
  component.base = diff(component.base, rendered);
}
Firstly, we create the virtual DOM with component.render method, then we just compare it with its current DOM state(that we saved in component.base field), and save the result of diff in it again. So our diff function should check if there are any new child, and in case it is true, we just append it. Here how it could look like:
if (dom) {
  // ...

  // check if there are any new children
  if (vnode.children.length !== dom.childNodes.length) {
    dom.appendChild(
      // render it with `renderNode` and append it
      renderNode(vnode.children[vnode.children.length - 1])
    );
  }

  // do the `diffing` for every child
  dom.childNodes.forEach((child, i) => diff(child, vnode.children[i]));
  // return updated DOM element
  return dom;
}
That’s it, we made it! Now take a look how it looks in our 3rd iteration:
 Re-rendering with diffing algorithm
As you can see the whole application and list do not re-render. Only the new child is added to list.
This is just a simple example with simple “diffing” algorithm, but hopefully it will make sense for those who are new to these concept. It can not be compared to what React does. Here is just a few things what is there in React’s diffing algorithm:
Comparing the types
Comparing the attributes(props)
Comparing the children
And of course there are tons of optimization under the hood, that makes React so powerful and beautiful UI library.
Resources: